


Although most prints in 10×15, or other popular sizes in photography, are printed in full bleed (no margin), certainly photos framed in a white margin take on a different appeal. Some see it as something vintage, others simply aesthetic because it enhances the image, or simply because “it’s different”, the fact is that it is a proposal that although it has existed all my life, lately it has become relevant again.
In this post we will explain how to print photos with white margin with your DNP RX1/HS or DNP DS620 printer without the need of additional software and simply using the driver commands provided by DNP.
Note: The DNP RX1/HS printer driver and the DNP DS620 printer driver are practically identical, so although you can see that the example is with a DNP DS620, you can follow the same steps with your DNP RX1 or DNP RX1HS if it is the case.
Let’s get started!
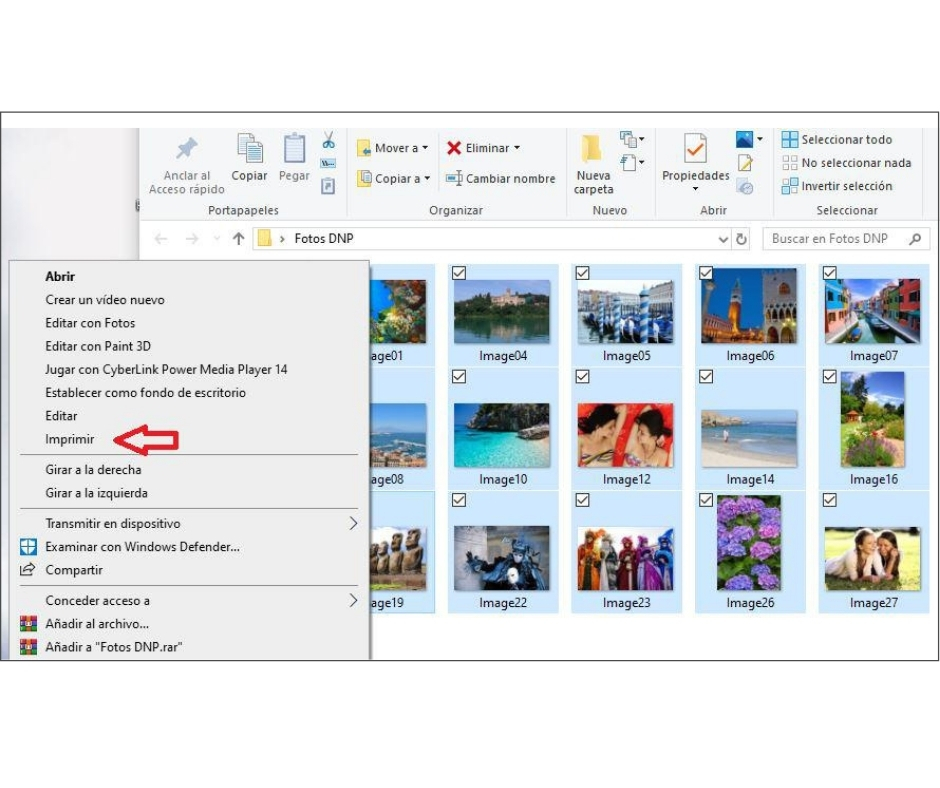
1. Open a folder and select the images. Then right-click and select “print”.
2. Select the printer and the print size, in this case we will put 10×15 (6×4). Following […]
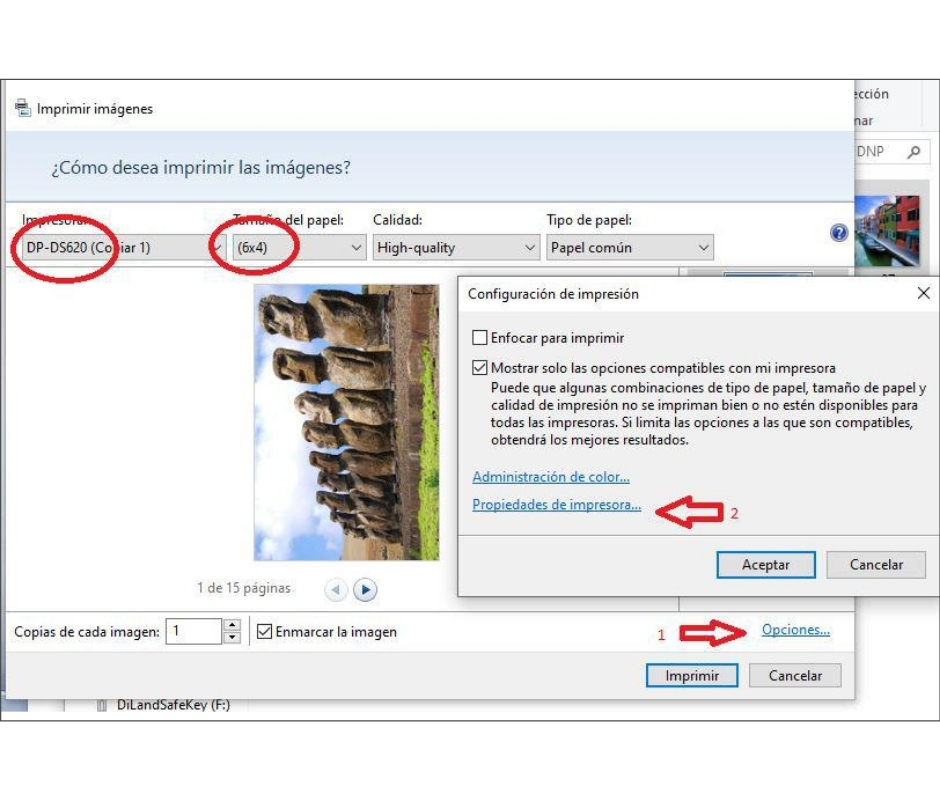
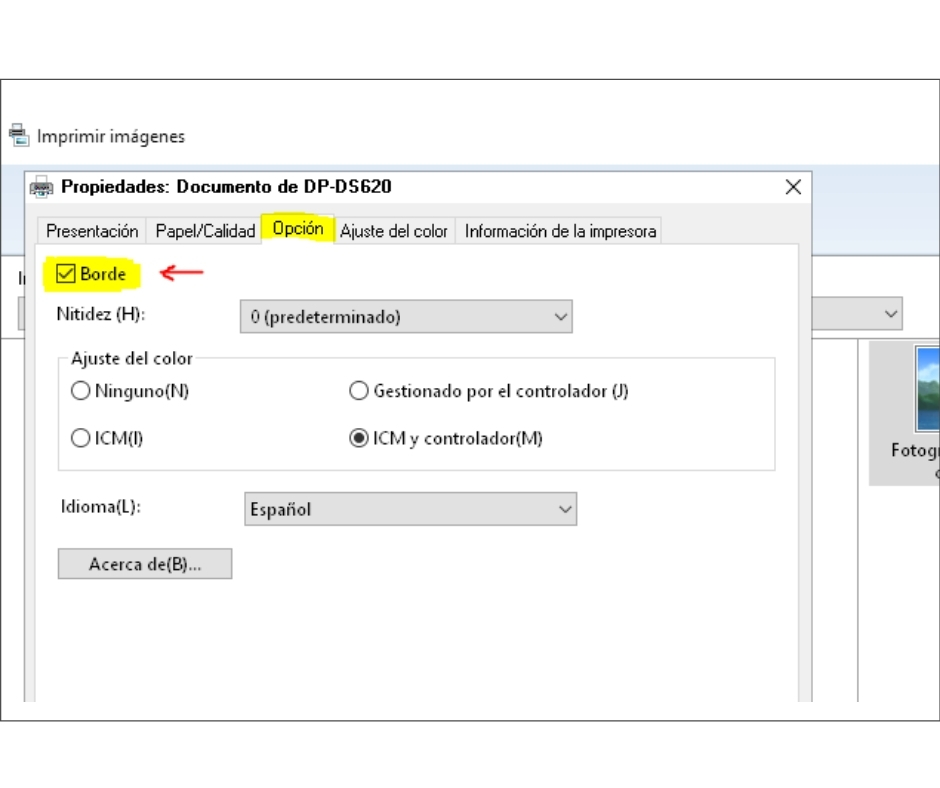
3. Now select the “Option” tab and then check the “Border” checkbox -> OK.
4. “Print” button
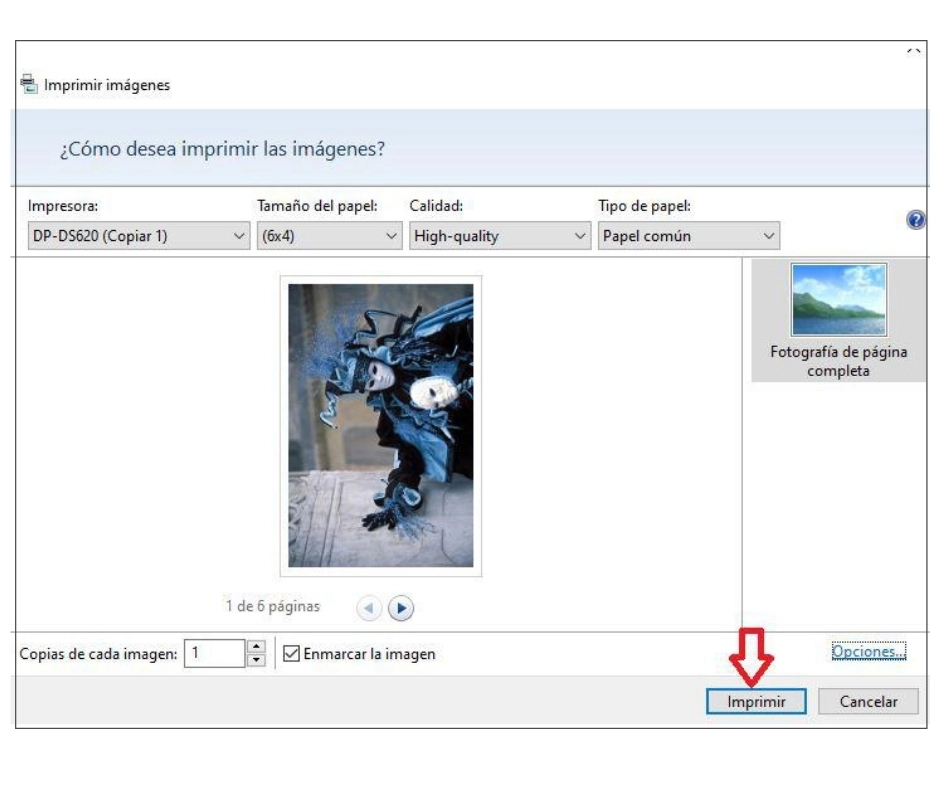
And this will be the final result.
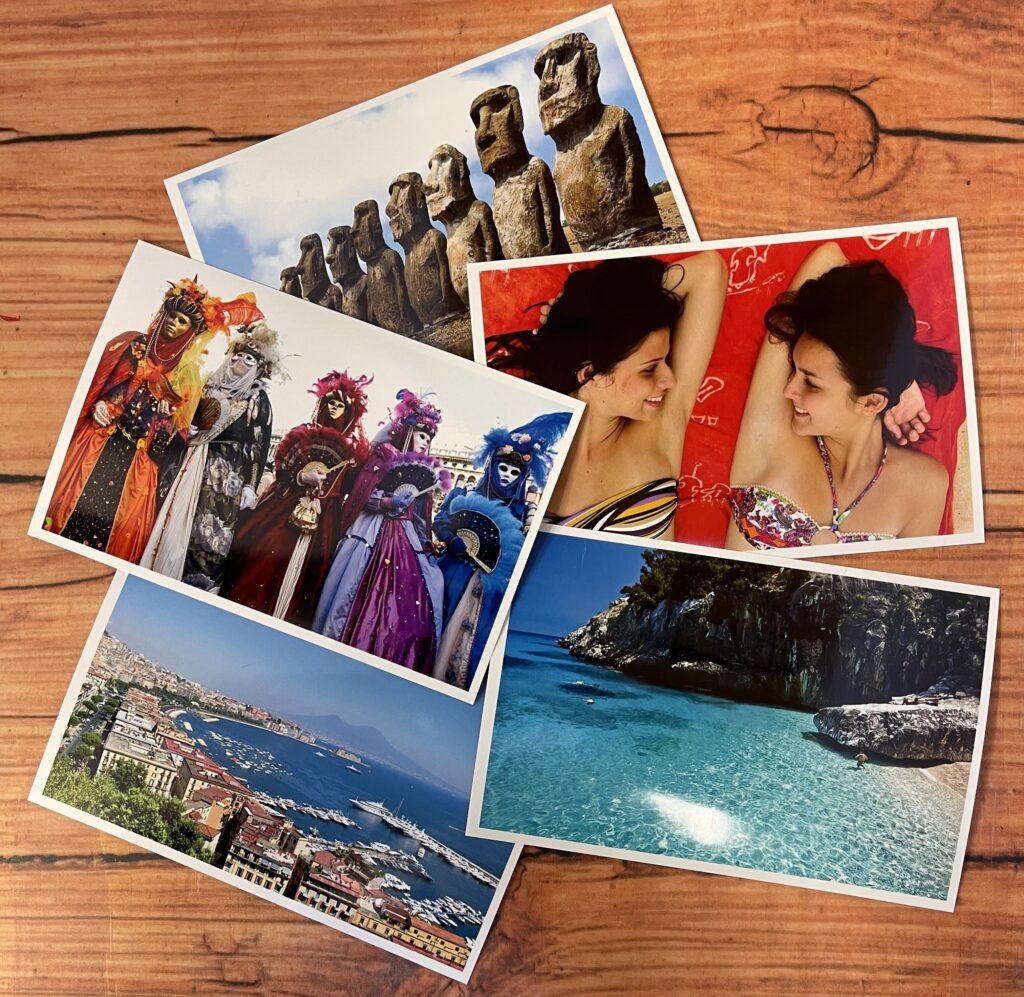
Note: It may happen that the white margins that appear are not exactly the same thickness on all 4 sides. If the differences are minimal, we can consider it as normal and in very exaggerated cases it would require a readjustment of the cut-off by our DNP Technical Service.
We hope you found it useful, we will publish more tips and tricks in the near future.


